Monday 27 November 2017
Wednesday 14 December 2016
Hats for the Homeless
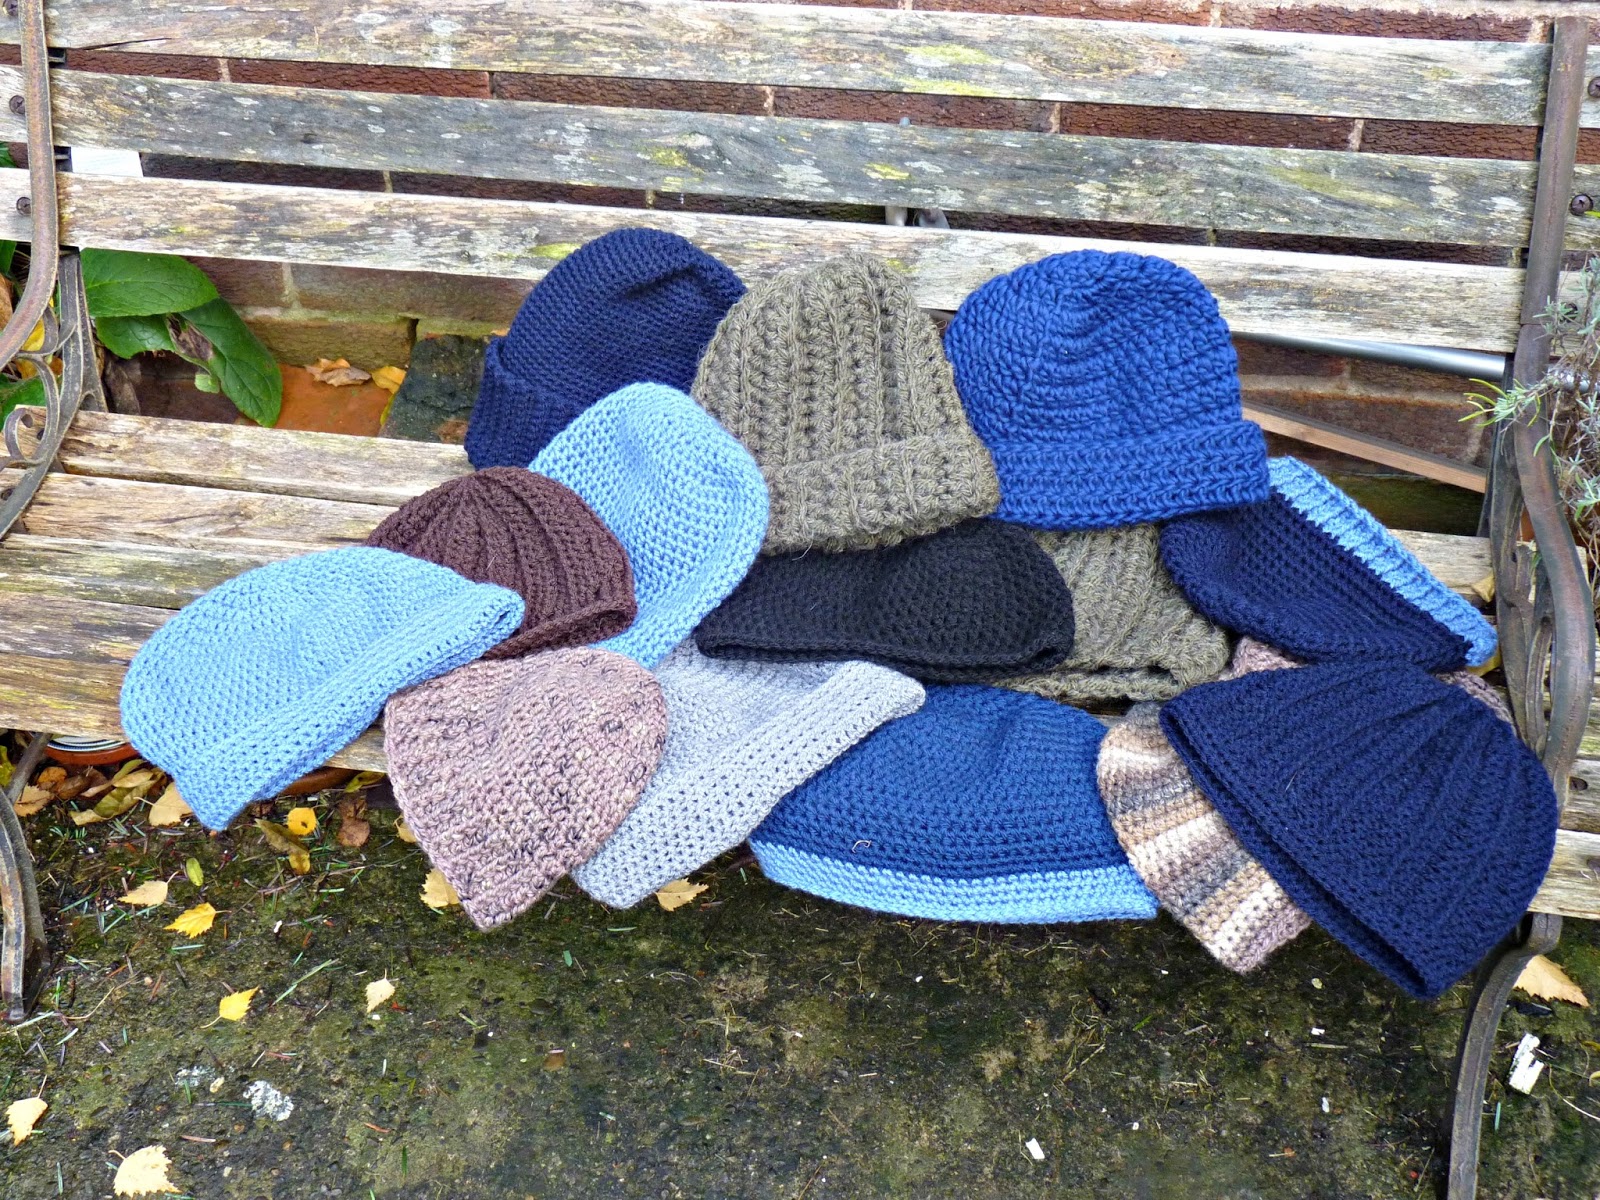
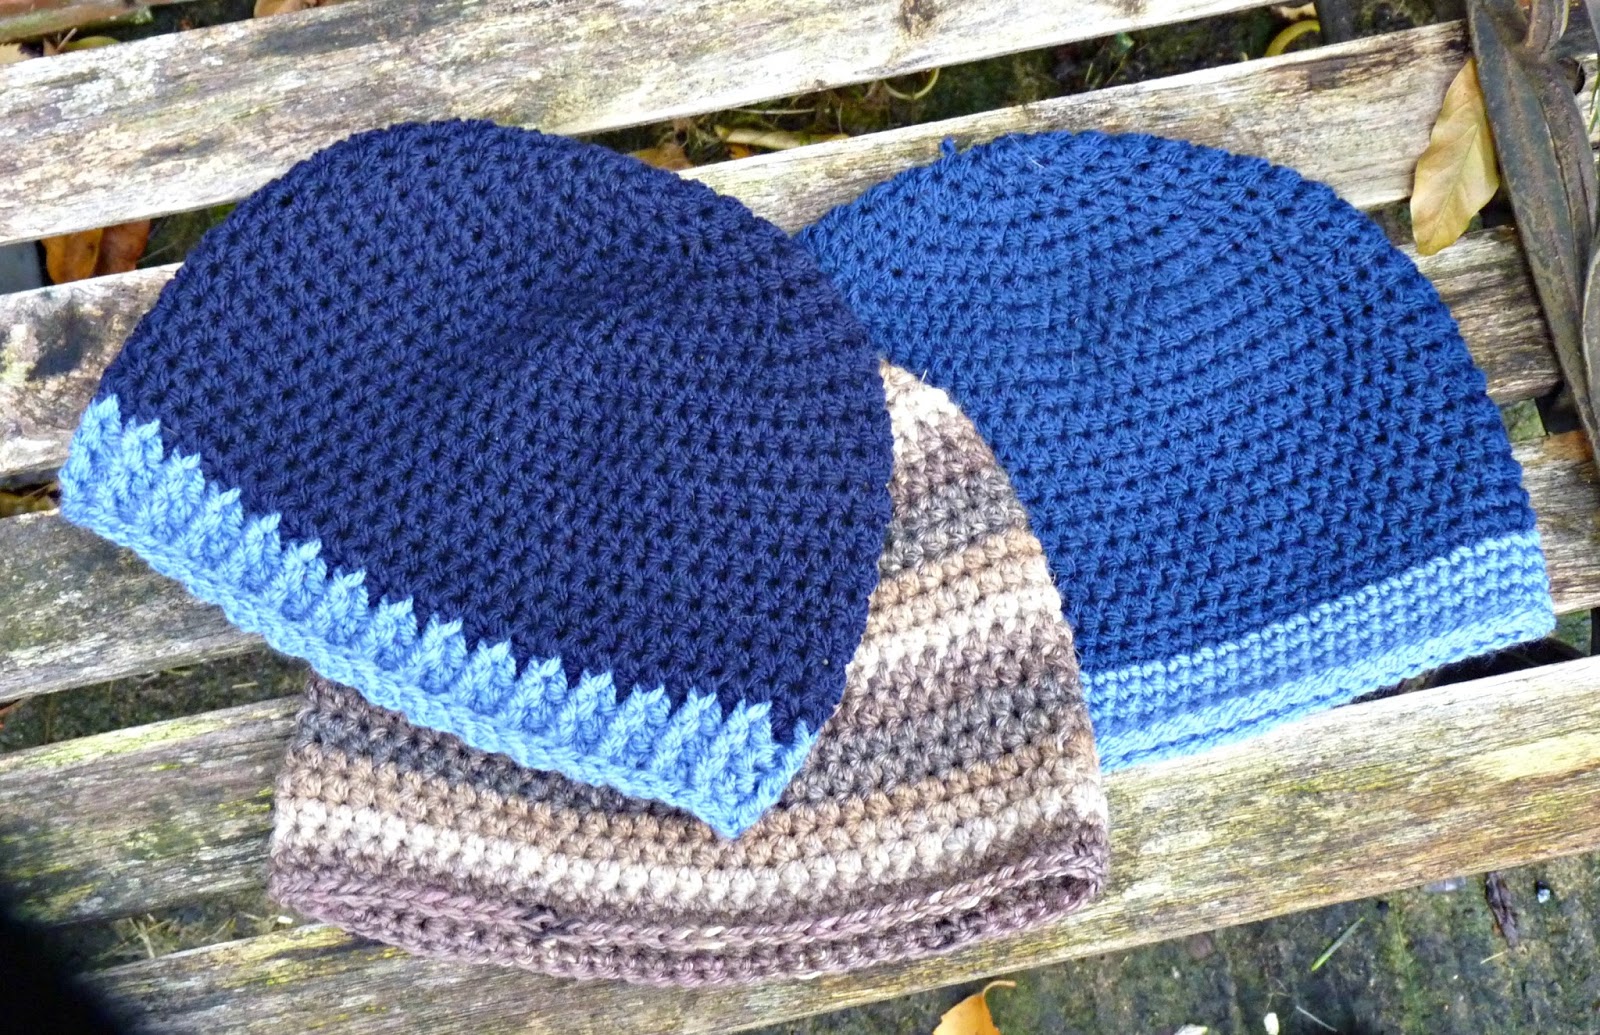
Hi all, I've been busy crocheting some hats to donate to the SHARE charity which supports the homeless and refugees. I thought it might be useful to do a little pattern round-up of the patterns I used, for other crocheters who might like to have a go at making a few hats to donate. With the cold weather coming they will be much needed.

I realise hats are a doddle for experienced crocheters who can obviously just go ahead a make one without a pattern, but these are great for beginners and also anyone else who just wants to get on with it with no thinking involved!
A few general points, things I have learned along the way...
1. Avoid bright colours and patterns which can attract attention and affect the safety of the homeless person.
2. Solid colours are best. For a couple of my hats I made the edging in a different colour, but only as I ran out of yarn. In hindsight it's probably best avoided I think.
3. For the same reason, avoid 'whacky' designs and stick to plain and conservative.
4. Use dark or earthy colours which won't show the dirt (the pic above shows some of the hats lighter in colour than they are in reality!)
So here's my round-up. For each pattern I've given the link to its Ravelry page, from where you can click through to the written pattern for the hat. I've done this because I always find it useful to look at the Ravelry 'projects' to see what other people do with the pattern. All the patterns are free and have US terminology.
Basic Men's Hat by Rebecca Langford. A great basic pattern which was actually designed with the homeless in mind.

Basic Half Double Crochet Hat by Oombawka Design. Similar to the one above, and again a very useful pattern with different sizes. Personally I found the largest size massive and for most purposes I think the two smaller adult sizes would be fine.

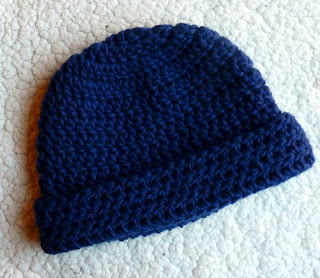
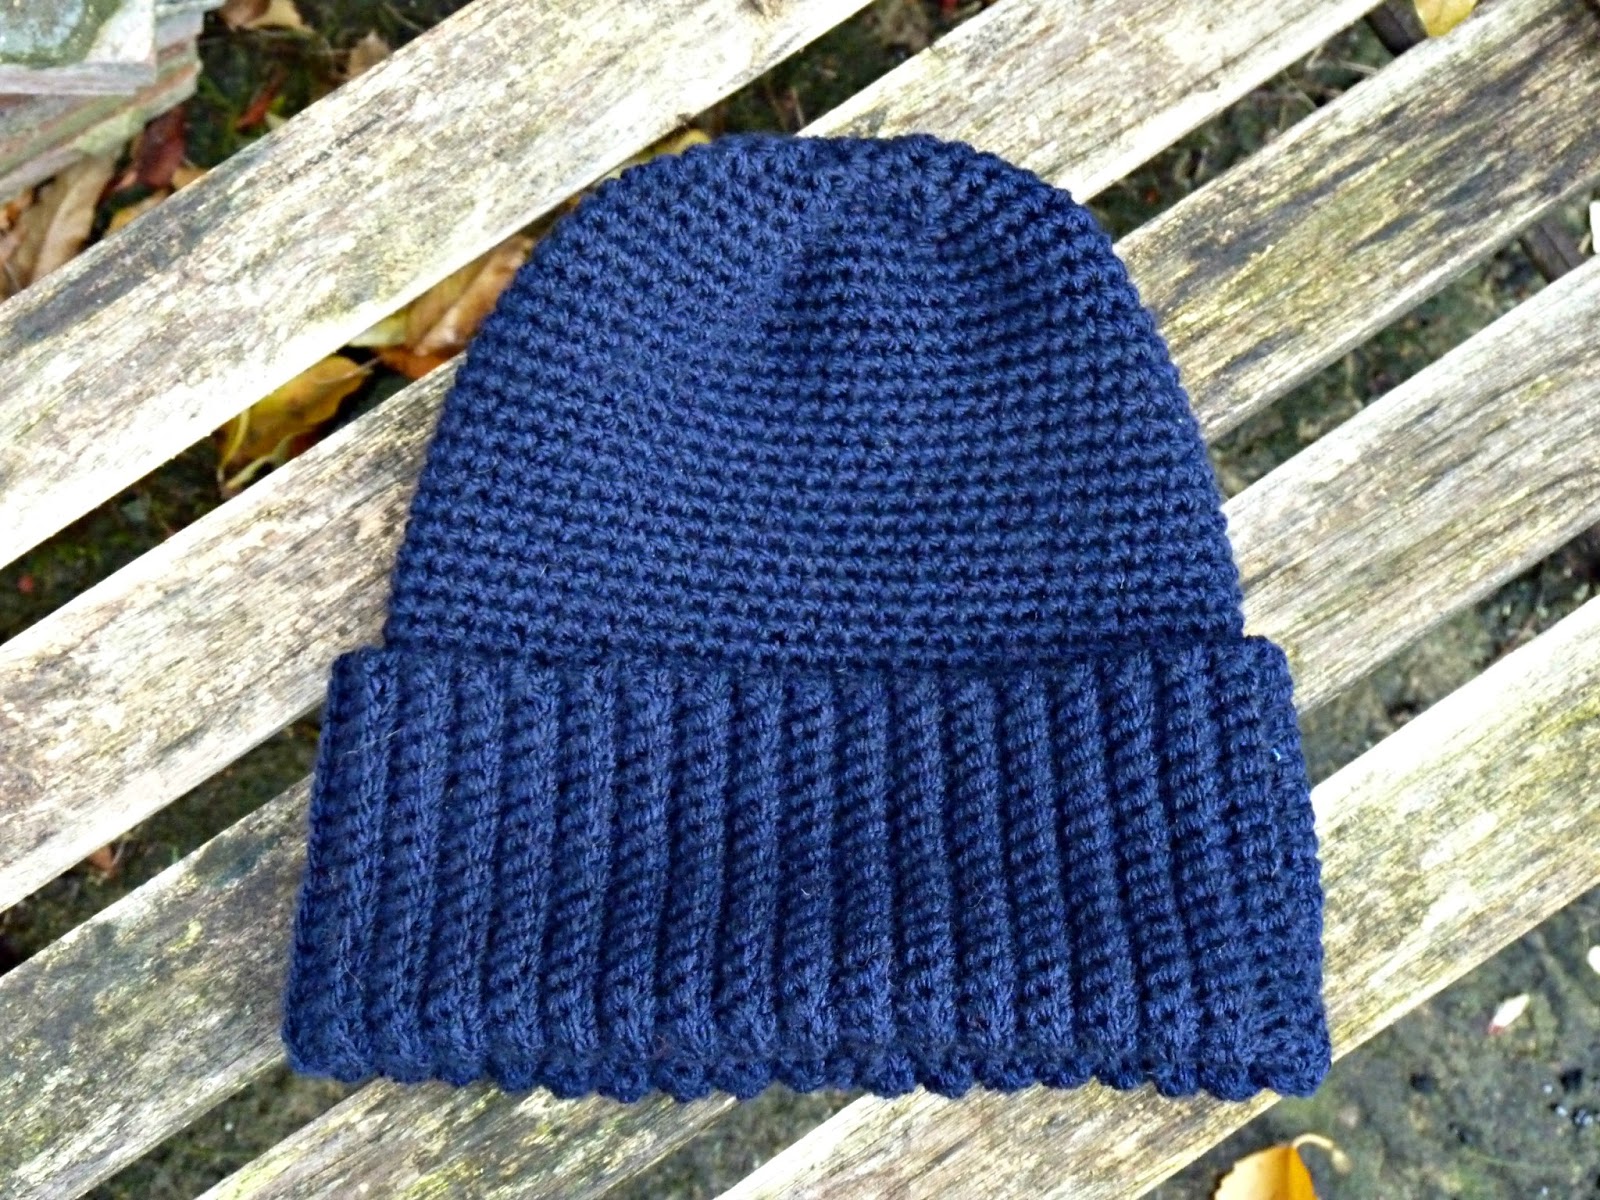
Pompom Hat by Caron Design. I absolutely love this pattern and would have made more in this design, but sadly didn't have enough yarn in any one colour. It's a yarn eater with that lovely thick ribbed edge which folds over, but well worth making as I think it'll be lovely and warm. I omitted the pompom on mine as I thought it best to keep it simple.

Men's Hat by Jayna Grassel. Lovely pattern, only the maths didn't work out for me with the stitch increases (could be me!)... however a couple of the Ravelry projects have tweaks which might be helpful. I really love the ribbed edging and ended up using it on other hats.

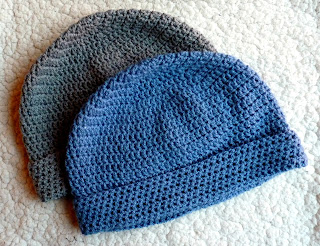
Truffle Shuffle Skully by Alia Smith. Loved this pattern and think it'll be another very warm one. I made two. One as written and the other with a turn up to make it look like a fisherman's hat. I just made the initial chain longer for the one with the turn up (23ch instead of 19). You could also make this with bulky/chunky yarn, using a 6mm or 6.5mm hook and changing the number of stitches in the starting chain accordingly to get the right height.

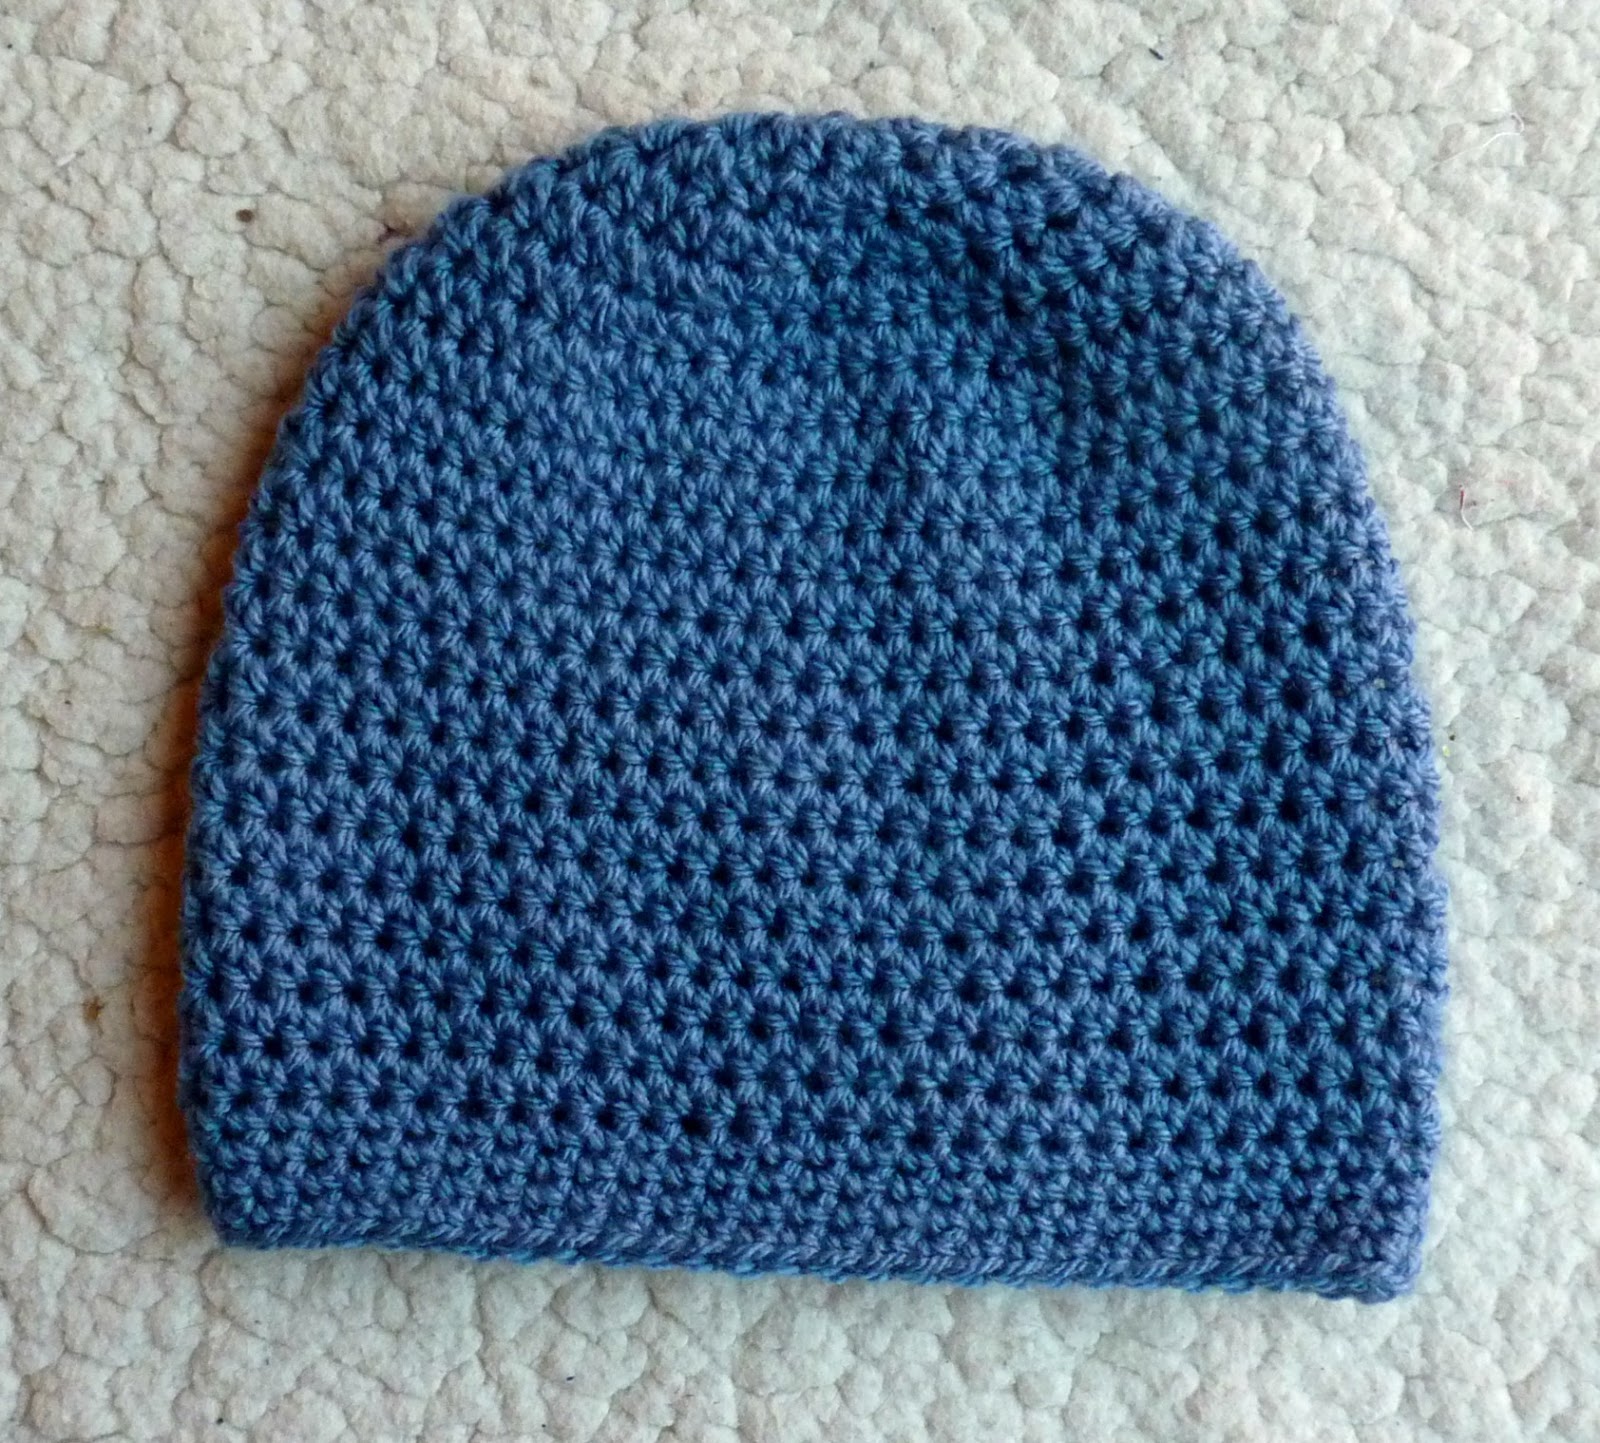
Crocheted Hat with Stripes by Drops Design. I made mine in a solid colour for the reasons mentioned, and carried on until it was long enough for a turn up. Another good basic pattern.
Simple Manly Hat by Mandie Williams. Came out rather on the large size with the hook recommended, so I'd go down a size or two if making it again.
Cosy Autumn Hat by Angela Scott. Nice knit-look ribbed design which will help give it more warmth.

Finally...
The science of a hat pattern is really not complicated. The principle of a basic beanie pattern is a flat circle made by increasing regularly each round, then when the circle is big enough (depending on the eventual size of the hat), stop increasing and work the same number of stitches each round until the hat is the desired height. For a really handy chart, head over to this page on Annie's Picture Perfect blog where you will find instructions for properly sizing crochet hats. It's an invaluable resource.
I'd love to know if you try any of these patterns and what you think of them. Also if you've found any other suitable hat patterns, please do let me know by commenting below.
I realise hats are a doddle for experienced crocheters who can obviously just go ahead a make one without a pattern, but these are great for beginners and also anyone else who just wants to get on with it with no thinking involved!
A few general points, things I have learned along the way...
1. Avoid bright colours and patterns which can attract attention and affect the safety of the homeless person.
2. Solid colours are best. For a couple of my hats I made the edging in a different colour, but only as I ran out of yarn. In hindsight it's probably best avoided I think.
3. For the same reason, avoid 'whacky' designs and stick to plain and conservative.
4. Use dark or earthy colours which won't show the dirt (the pic above shows some of the hats lighter in colour than they are in reality!)
So here's my round-up. For each pattern I've given the link to its Ravelry page, from where you can click through to the written pattern for the hat. I've done this because I always find it useful to look at the Ravelry 'projects' to see what other people do with the pattern. All the patterns are free and have US terminology.
Patterns using worsted weight/ aran:
Basic Men's Hat by Rebecca Langford. A great basic pattern which was actually designed with the homeless in mind.
Basic Half Double Crochet Hat by Oombawka Design. Similar to the one above, and again a very useful pattern with different sizes. Personally I found the largest size massive and for most purposes I think the two smaller adult sizes would be fine.
Pompom Hat by Caron Design. I absolutely love this pattern and would have made more in this design, but sadly didn't have enough yarn in any one colour. It's a yarn eater with that lovely thick ribbed edge which folds over, but well worth making as I think it'll be lovely and warm. I omitted the pompom on mine as I thought it best to keep it simple.
Men's Hat by Jayna Grassel. Lovely pattern, only the maths didn't work out for me with the stitch increases (could be me!)... however a couple of the Ravelry projects have tweaks which might be helpful. I really love the ribbed edging and ended up using it on other hats.

Patterns using super bulky/ extra chunky weight yarn:
Truffle Shuffle Skully by Alia Smith. Loved this pattern and think it'll be another very warm one. I made two. One as written and the other with a turn up to make it look like a fisherman's hat. I just made the initial chain longer for the one with the turn up (23ch instead of 19). You could also make this with bulky/chunky yarn, using a 6mm or 6.5mm hook and changing the number of stitches in the starting chain accordingly to get the right height.

Crocheted Hat with Stripes by Drops Design. I made mine in a solid colour for the reasons mentioned, and carried on until it was long enough for a turn up. Another good basic pattern.

Patterns using DK. (Generally not advisable for extremely cold weather, but would be fine for Autumn/Spring and I had a lot of DK in my stash so thought I might as well...)
Simple Manly Hat by Mandie Williams. Came out rather on the large size with the hook recommended, so I'd go down a size or two if making it again.

Cosy Autumn Hat by Angela Scott. Nice knit-look ribbed design which will help give it more warmth.

Finally...
The science of a hat pattern is really not complicated. The principle of a basic beanie pattern is a flat circle made by increasing regularly each round, then when the circle is big enough (depending on the eventual size of the hat), stop increasing and work the same number of stitches each round until the hat is the desired height. For a really handy chart, head over to this page on Annie's Picture Perfect blog where you will find instructions for properly sizing crochet hats. It's an invaluable resource.
I'd love to know if you try any of these patterns and what you think of them. Also if you've found any other suitable hat patterns, please do let me know by commenting below.
Monday 11 January 2016
Colourful Octagons Throw
Got
your sunglasses on? I read somewhere the other day that it's a sign of getting
old when you start gravitating towards really bright colours. Something to do
with that eccentric crazy cat lady thing, I imagine. Whatever it is, I'm really
drawn to colourful things- but then I think I always have been. I finished this
throw a few days ago and I'm very happy with it. I came across the pattern
quite by accident and as soon as I saw it in Sue Pinner's blog I knew I HAD to
make it as it's just up my street. It was a CAL and all the details are still
up. It's a brilliant pattern and it works up relatively quickly as it's done it
chunky/bulky yarn. The giant flowers were done separately and sewn on afterwards.
I loved Sue's colour choice and placement so I followed it exactly. I also love
how it goes with my Attic 24 Raindrop Cushion which I made a while back in the
same colours...


smile emoticon


smile emoticon


Sunday 3 January 2016
Granny Square Scarf
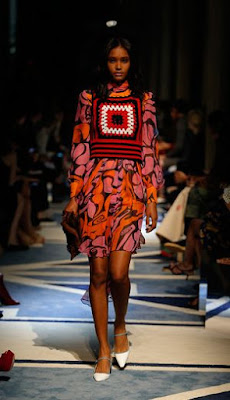
Crochet is very in vogue at the moment, luckily for me. Plus the good old granny square so popular in the 1970s (see my Paul McCartney waistcoat post) is definitely making a comeback, and has recently been seen on a few catwalks....
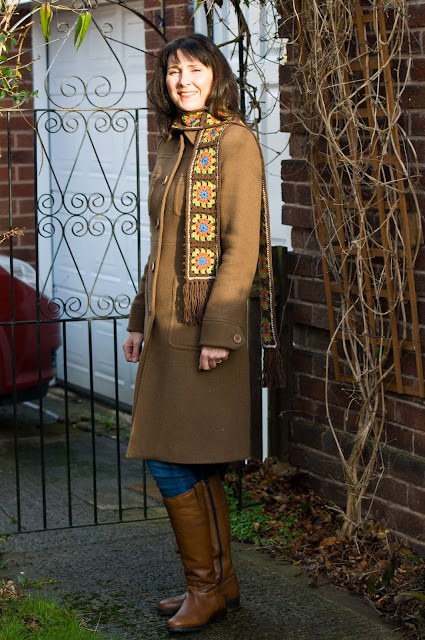
For a long time now I've been hankering after a granny square scarf, so decided to go ahead and make one. One day I was doing a shop with my Tesco 'Orla Kiely' bag and noticed the colours on it went really well with my brown coat..... Hmmm. I've seen various people using objects as inspiration for their colour choices- I'd never done it before, but it seemed like a great idea, especially as I own virtually every colour under the sun in good old Stylecraft Special DK. After looking at loads of examples of scarves other people had made, I decided I preferred the look of the ones where the squares were all the same, rather than the colours placed randomly throughout the scarf. I decided on brown for the main colour, with blue, orange and green for the squares, and a light beige as the light accent going around them after joining. They're not colours which I'd normally put together, but I was quite pleased with the result!
Here's the finished article (along with said bag!!)...

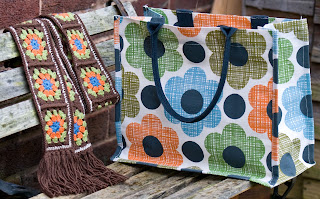
Simplicity itself to make! If you'd like to make your own scarf, here's what I did.
1. Choose yarn in the colours of your choice. As mentioned, I used Stylecraft Special DK in walnut, aspen, spice, meadow and parchment, with a 4mm hook.
2. Make 18 squares. You can use a traditional granny square pattern (widely available everywhere), but I decided to use the Summer Garden pattern from Attic24, just to be a bit different. I did 3 rounds as instructed in the 3 colours, then added an extra round in walnut- my joining colour, making sure I did 3ch in each corner of the last round to make them more square.
3. Join squares using the raised SC joining method.
4. Work around entire scarf in sc with the light accent colour. Work 1 sc in each dc and in each ch space, and 3sc in the corners at either end, and where each square joins the next, work as follows: 1 sc in chain space of right-hand square, 1 sc dec using the ch spaces from both squares, 1 sc in chain space of left-hand square.
5. Work around entire scarf in hdc in the main colour, with 3 hdcs in each corner.
6. Add fringe if desired. I made 8 tassels for each end used 5 doubled-over strands for each one. I used the same method that I used for my Doctor Who scarf.
Don't forget to let me know if you make a granny scarf- I'd love to see what you make!
Tuesday 10 November 2015
Happy Zoo Blanket
This was a joint collaboration with a crocheter friend Jen, for another friend (that's her in the pic) who is about to give birth any day now to a baby boy. The pattern is the Zoo Blanket by Knot Your Nana's Crochet. We did 6 animals each, I did all the background squares and my friend did the joining and the border. The photo doesn't begin to do justice to the vibrant colours or the texture. But we're so pleased how it turned out, and the recipient is beyond delighted!

Thursday 30 April 2015
Mandala Wall Hanging
I was recently asked by my crochet friend Angela McWhinnie
Armstrong of Get Knotted Yarn Craft fame, if she could use a couple
of photos of mine for a forthcoming blog article about mandalas. She's a
talented lady with an extremely popular Facebook
page, so I was more than a little honoured!
It made me think of all those projects I've ever done before
I actually started writing a blog, and I had so much fun making my mandala wall-hanging, I
thought it would deserve its own retrospective blog post!
According to
Wikipedia, the word 'mandala' actually simply means 'circle', and is 'a
spiritual and ritual symbol in Hinduism and Buddhism, representing the Universe.'
But in the world of crochet, it usually just means a colourful round doily, of any
size.
We have a large expanse of wall behind our sofa, which was
crying out for something to hang from it. It had been bare for years, because
I'd never been able to make up my mind what to hang there. I went through a
mandala craze last year, and had a sudden brainwave to crochet a huge,
ginormous mandala and somehow mount it.....I wasn't sure how, just yet!
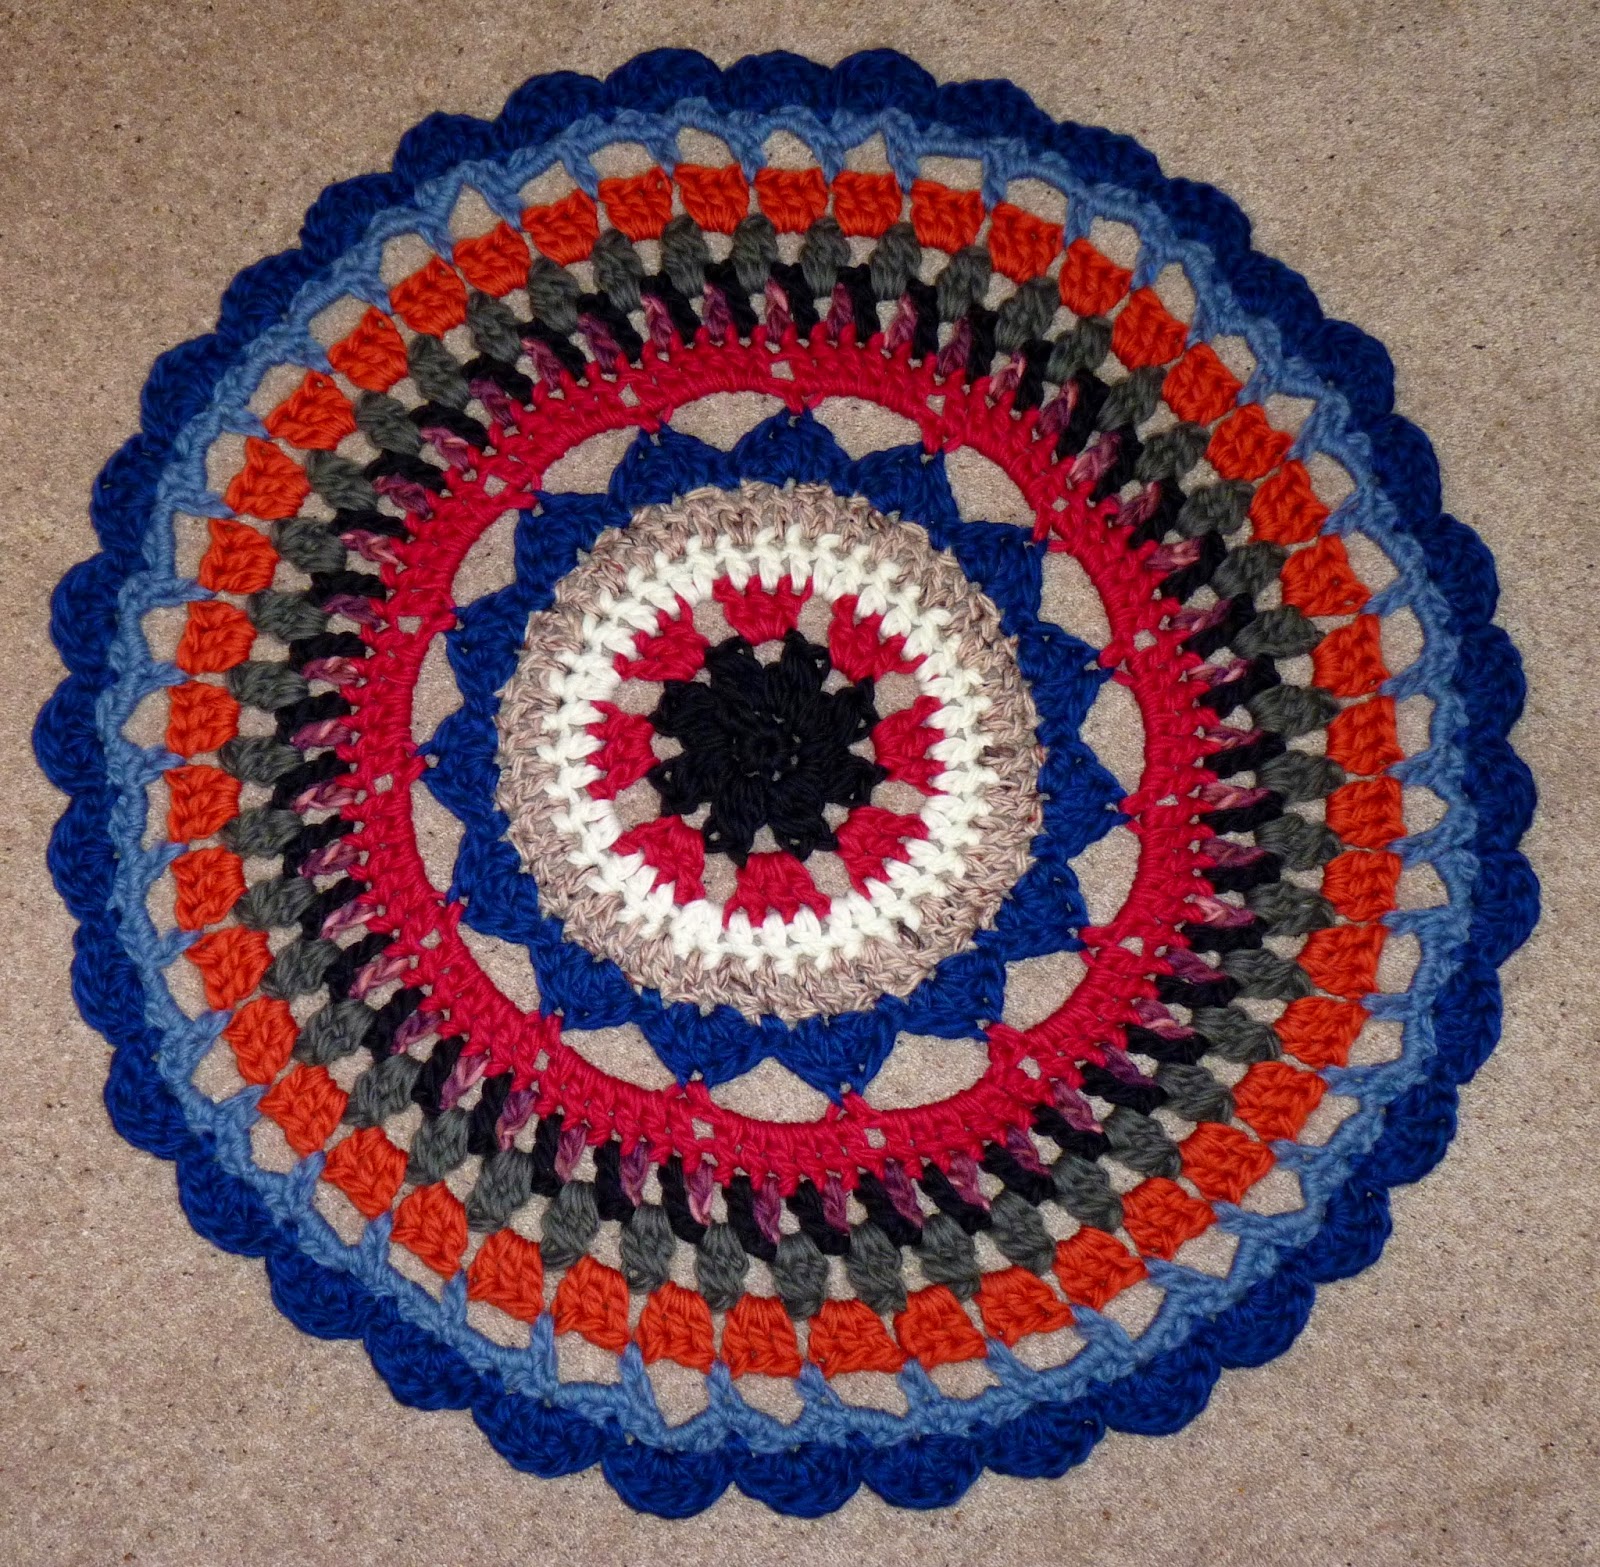
So what I did was to find a mandala pattern I liked, then to crochet
multiple strands of super bulky yarn together, to make it really biiiiig. After
sifting through a lot of patterns, I decided to use one that I had seen being
used as a CAL ('crochet a-long') on Mandy's Craft Tales Facebook page. The pattern can be
found on a lovely blog called By Petra, here made in cotton DK and used as a stool cover.
I decided to make mine from 3 strands of Drops Eskimo crocheted together with a massive 15mm
hook, having chosen colours to match our decor. This is how it turned out!
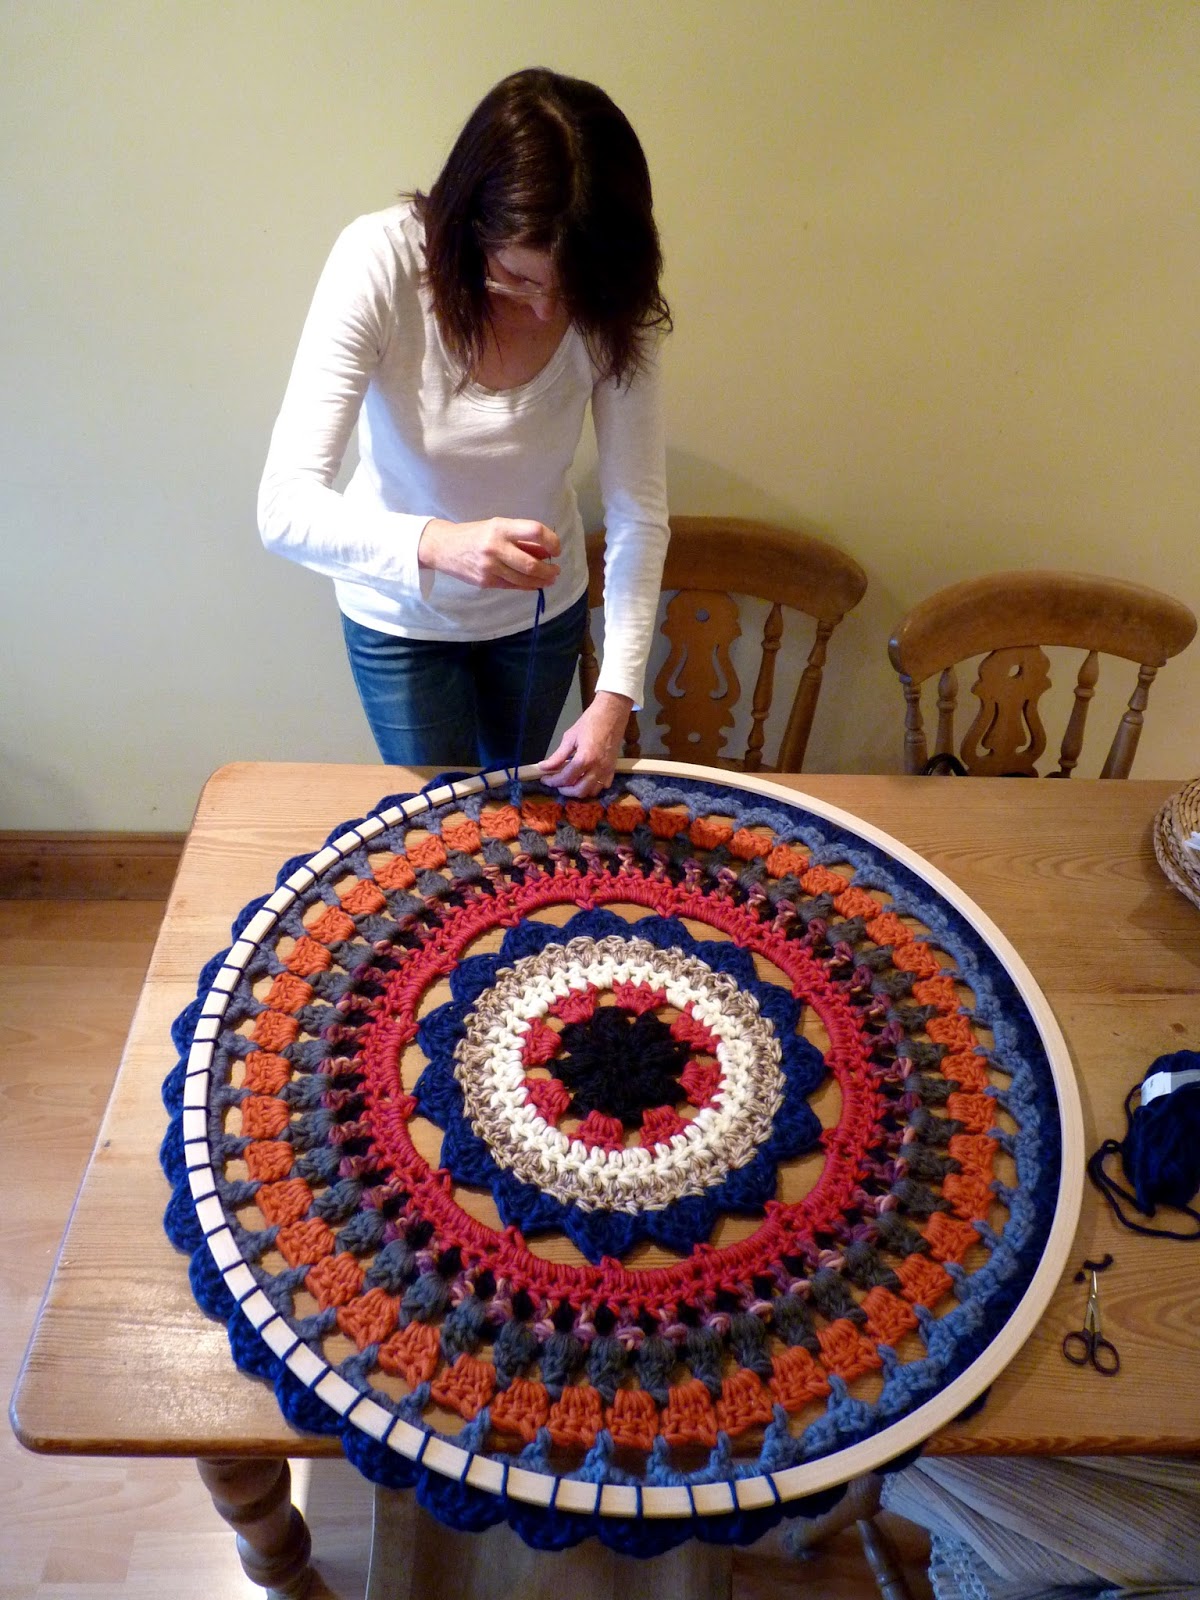
This next pic gives some idea of scale....it shows me
mounting it onto a large wooden hula hoop, which I had to order from Germany as
I could only find plastic ones here in the UK!
And....last but not least. Here it is hanging in all its
glory, in pride of place. I enjoyed making it so much.

Friday 20 February 2015
Magic Carpet Mandala Blanket
Last week I finished a project I've been working on for nearly a year. I think I have to say that it's been the most enjoyable crochet item I've ever worked on, EVER. I've just loved the challenge, and whilst I love the therapeutic repetitive nature of some projects (the poncho in the previous post, for instance), I also appreciate projects when you're always learning something new and every round is different! There is such an immense amount of satisfaction at each stage.
The 'Magic Carpet Ride' Mandala Blanket was designed by the incredibly clever and talented Toni of Just Dunny Crochet. I've never tried to design a crochet pattern, but I'm sure even if I did, I could only DREAM of ever being able to come up with something like this. I think she's probably a genius, actually :-) Seriously, go and look at Toni's beautiful blanket designs- they will blow your mind.
This being an untested and unproven pattern, Angela from Get Knotted Yarn Craft and Martha from Martha's World of Crocheted Critters decided to set it up as a CAL ('Crochet A-Long') last April with members of the Creative Crochet Crew group on Facebook, with the aim of eventually coming up with a fully tested pattern using Toni's extensive notes, to eventually go on her blog and on Ravelry. Check out Martha's Magic Carpet journey too!
After a few weeks they invited me on board to help lead the CAL- something about my nerdy reputation for being able to spot mistakes in patterns and my attention to detail, I think. Or something. Anyway, I chipped in with my penn'uth every now and then, but I have to admit it was really Angela and Martha who did most of the hard work...
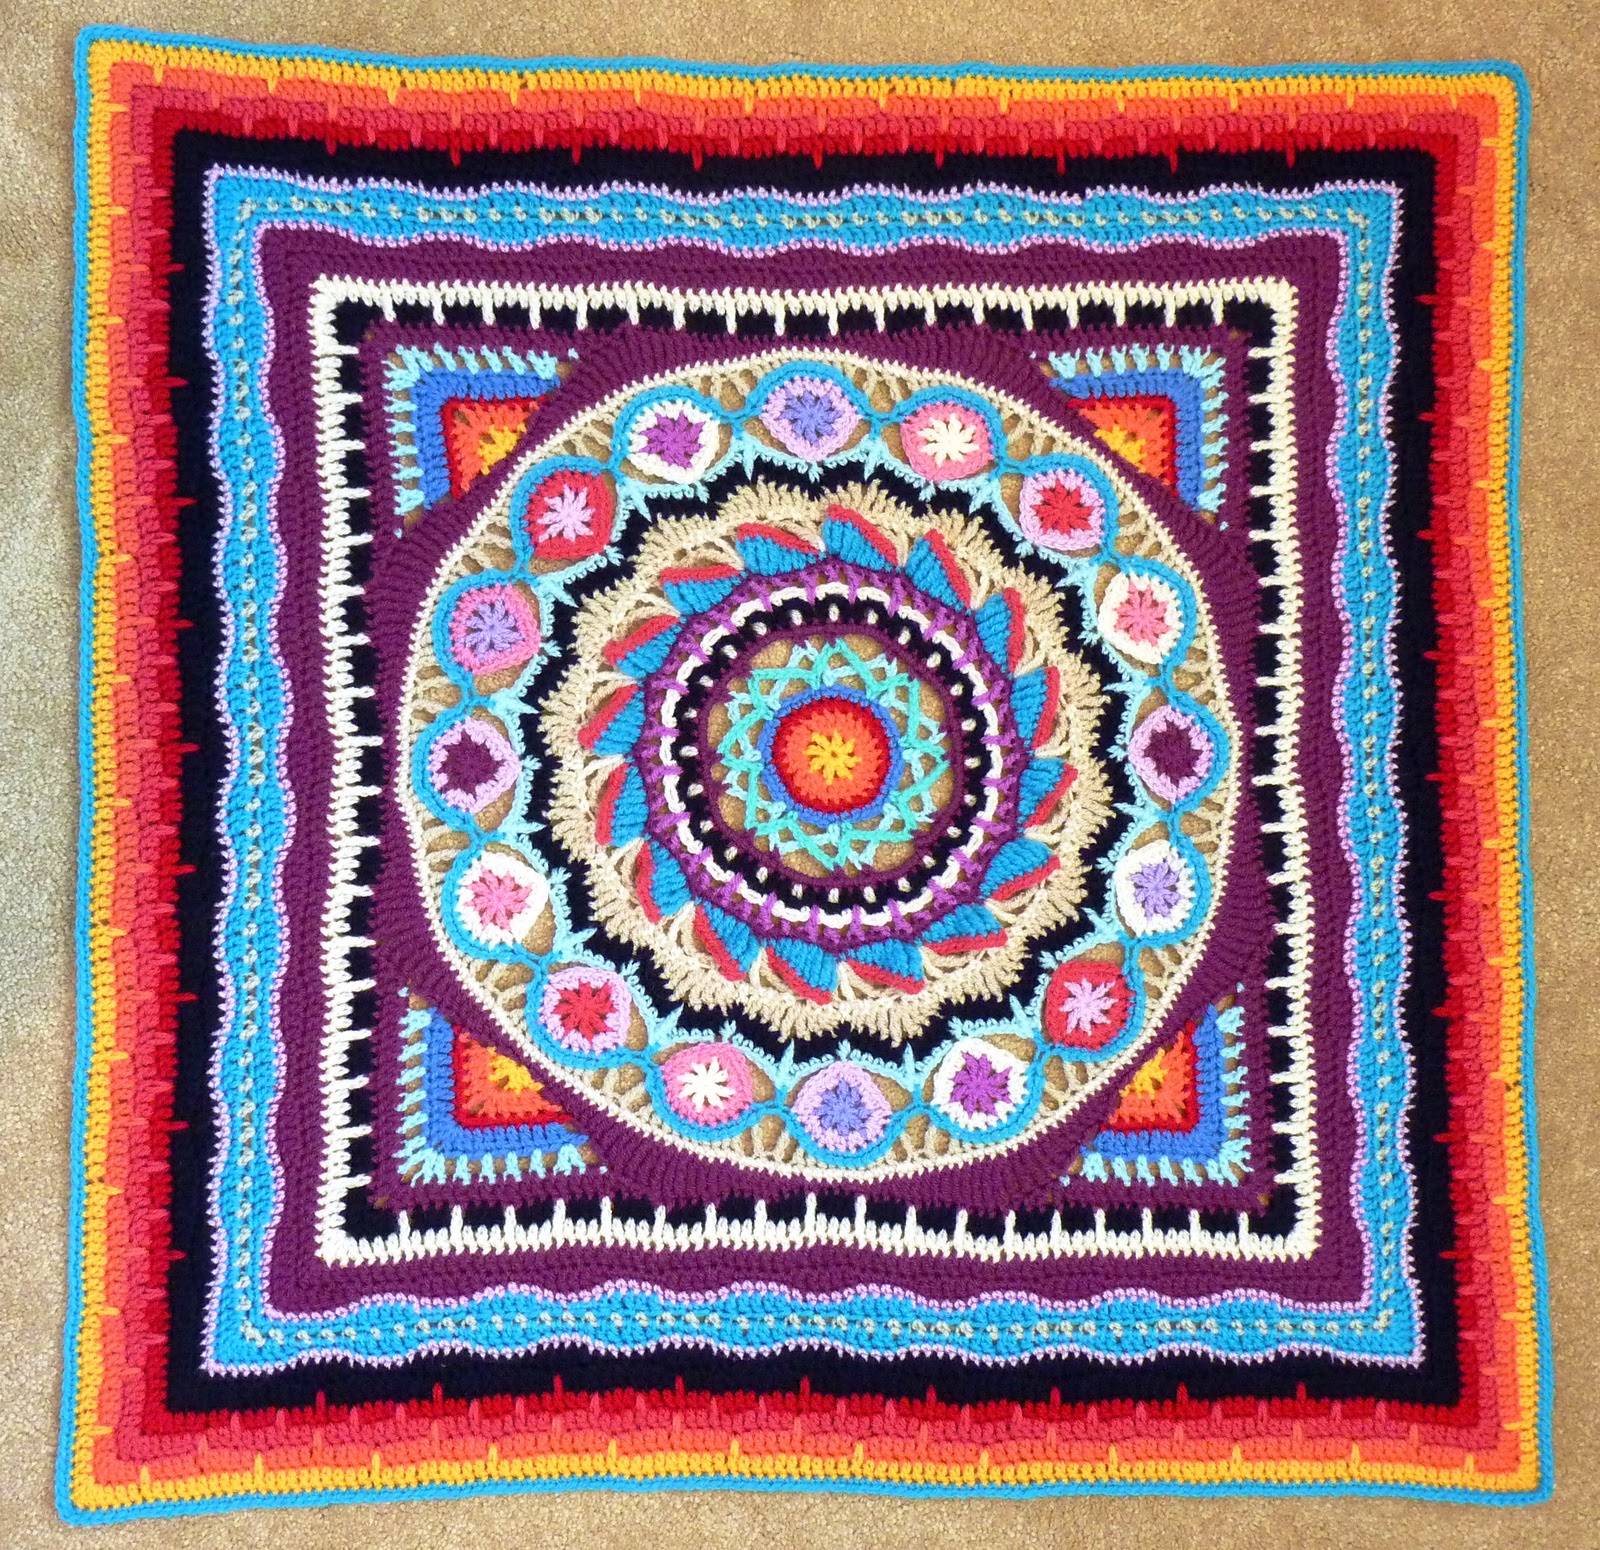
For my version I used good old Stylecraft Special DK, in a range of colours, very much with RED ('lipstick') as a theme, like Toni's original. One of my favourite parts of the blanket is the central mandala. The 16 little medallions around the edge were all worked and attached individually. A lot of work but SO worth it!

The aim of the pattern from here was to go from a circle to a square, via an octagon and 4 corners...

 ....then some piano keys, some crashing waves and a sunburst....
Until eventually the central square panel was done.
The magic word for me when making this blanket was to block, block, block. After each stage I blocked religiously before going on to the next bit. It really has helped to keep it square and now it's finished it has been so worth it as it sits flat and the corners are pretty much square.
The central panel is as far as the written proven pattern has gone, and it's now published in Toni's blog, if you want to make a start on making your own magic carpet!
The remainder of the pattern was adding two end panels with 8 large medallions on each side,
 and crocheting around the lot to make a very large rectangle. These end panels will be added to the proven pattern in due course.
Here is the end result of my Magic Carpet blanket. I absolutely love how it turned out. It's got so big now (perhaps single bedspread size?) as you can imagine it's hard to photograph by a mere mortal. Hubby came to the rescue with his pro camera, photographic studio and expertise. But I still don't have a clue about where it will go in the house..... Hmm! Perhaps I'll have to redecorate a room to match...
.jpg)
The 'Magic Carpet Ride' Mandala Blanket was designed by the incredibly clever and talented Toni of Just Dunny Crochet. I've never tried to design a crochet pattern, but I'm sure even if I did, I could only DREAM of ever being able to come up with something like this. I think she's probably a genius, actually :-) Seriously, go and look at Toni's beautiful blanket designs- they will blow your mind.
This being an untested and unproven pattern, Angela from Get Knotted Yarn Craft and Martha from Martha's World of Crocheted Critters decided to set it up as a CAL ('Crochet A-Long') last April with members of the Creative Crochet Crew group on Facebook, with the aim of eventually coming up with a fully tested pattern using Toni's extensive notes, to eventually go on her blog and on Ravelry. Check out Martha's Magic Carpet journey too!
After a few weeks they invited me on board to help lead the CAL- something about my nerdy reputation for being able to spot mistakes in patterns and my attention to detail, I think. Or something. Anyway, I chipped in with my penn'uth every now and then, but I have to admit it was really Angela and Martha who did most of the hard work...
For my version I used good old Stylecraft Special DK, in a range of colours, very much with RED ('lipstick') as a theme, like Toni's original. One of my favourite parts of the blanket is the central mandala. The 16 little medallions around the edge were all worked and attached individually. A lot of work but SO worth it!
The aim of the pattern from here was to go from a circle to a square, via an octagon and 4 corners...
....then some piano keys, some crashing waves and a sunburst....Until eventually the central square panel was done.
The magic word for me when making this blanket was to block, block, block. After each stage I blocked religiously before going on to the next bit. It really has helped to keep it square and now it's finished it has been so worth it as it sits flat and the corners are pretty much square.
The central panel is as far as the written proven pattern has gone, and it's now published in Toni's blog, if you want to make a start on making your own magic carpet!
The remainder of the pattern was adding two end panels with 8 large medallions on each side,
Here is the end result of my Magic Carpet blanket. I absolutely love how it turned out. It's got so big now (perhaps single bedspread size?) as you can imagine it's hard to photograph by a mere mortal. Hubby came to the rescue with his pro camera, photographic studio and expertise. But I still don't have a clue about where it will go in the house..... Hmm! Perhaps I'll have to redecorate a room to match...
Subscribe to:
Posts (Atom)